
How to Print Printables: A Guide for Busy Homeschool Moms
If you’re a working homeschool mom trying to simplify your life with digital printables — but you’re not sure where to start when it comes to printing them — this guide is for you.
Whether you’ve grabbed one of my printables from the Practical Printables System, from my shop, or downloaded a resource from another creator, I’m walking you through exactly how to print printables at home, what tools you really need, and when it might make sense to outsource.
Afterall, printables are amazing for working homeschool moms but only if you print them! So let’s get them off your computer so you can use them!

What Is a Printable?
Let’s start with the basics. What is a printable?
A printable is a digital file that is text, graphic or a mix of both (usually a PDF format) designed to be printed and used at home.
These can include:
- Planners
- Homeschool activity pages
- Journal prompts
- Checklists
- Flashcards
Homeschool printables are a big part of homeschooling for many moms because they offer flexibility, creativity, and a low-prep way to supplement learning. They’re perfect for reinforcing concepts, building routines, and saving time when life gets busy.
Most of the time, printables are downloaded instantly and used again and again — which makes them a go-to tool for busy moms who don’t have time to reinvent the wheel every week.
Need a few ideas on how to use printables in your homeschool? Well, let’s get them printed so you can use them!
Step-by-Step: How to Print a Printable at Home
Let’s walk through the process using an example from the Practical Printables Vault (like the Mini Curriculum Toolkit or Spring Break Learning Challenge).
1. Download the File
The first step to printing a printable is downloading the file. After you create or purchase a printable, you’ll receive a digital file — most often in PDF format. When you’re using a resource from a site like the Practical Printables System, you’ll typically click a link that opens the PDF in Google Drive.
Here’s how to save it:
- On a computer: Click the printable link, then click the download icon (⤓) in the top-right corner. Save it somewhere easy to find (like your desktop or downloads folder).
- On a tablet or phone: Tap the printable link. You may need to click the three dots or use the share button to save it. If you’re on an iPhone or iPad, choose “Save to Files” or open in your PDF viewer.
Tip: Always double-check that you’re downloading the PDF version, not just opening it in preview mode.
2. Open the File to Print
Now that you’ve downloaded your file, the next step is to open it so you can print it.
Tip: I like to organize my downloads into folders — like “Homeschool Printables” or “To Print” — so I can easily find what I need later when I want to reprint them.
Find the file you want and open it. Most devices will open PDFs by default. If not, you can use a free app like Adobe Acrobat Reader. Avoid printing directly from your web browser — it can sometimes cause layout or margin issues.
Once your file is open:
- Look for the printer icon (🖨️)
- Or use the shortcut Ctrl + P (Windows) or Command + P (Mac) to open the print dialog
This will bring up your printer settings — and you’re ready for step 3!
3. Check Your Print Settings
Once your print window is open, take a moment to review your settings. Every printer looks a little different, but most settings will be similar to the ones shown in the example below.
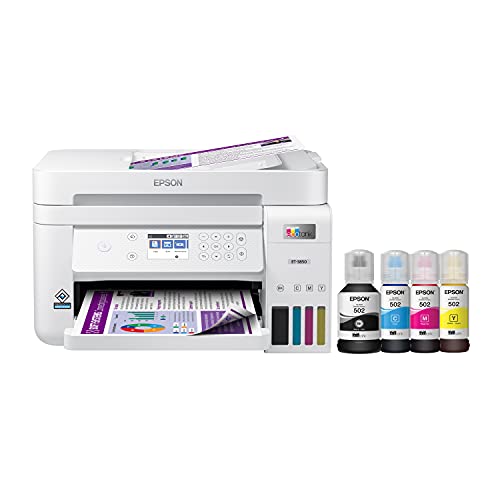
This is a screenshot from my personal printer settings with my Epson Ecotank ET-3830 for the Curriculum Mini Toolkit printable from my vault.

Here’s what to check before clicking “Print”:
Paper Size
Most printables from the Practical Printables System are designed for US Letter (8.5”x11”). Double-check that your printer is set to this size.
Scale
- Choose “Actual Size” if you want the layout to print as designed
- Or select “Fit to Page” if you’re concerned about slight margin cutoffs
I personally choose “Fit” 95% of the time — especially if I’m not using borderless printing.
Print Range
Only want a specific page or two? Use the page range box to print exactly what you need (e.g., pages 2–4).
Color vs. Black & White
Go with what works best for your printer and budget. I use an Epson EcoTank, and the ink is so affordable I print in color often — but black & white works just fine for most printables too.
Disclosure: I may receive commissions for purchases made through links in this post.
Orientation
Most printables, but not all! are portrait, but double-check this setting if your preview looks off.
4. Choose Your Paper
When learning how to print printables effectively, paper choice can make a huge difference. Print quality often depends just as much on the paper as the printer itself.
Here’s what I recommend:
- Use 24–32 lb. paper for anything you’ll write on regularly (heavier weight means smoother writing and less ink bleed-through)
- Use cardstock for reusable tools like checklists, reference charts, and flashcards
- Choose matte finish paper for journal or coloring pages
📌 Tip: Keep an eye out for back-to-homeschool sales in July or August — that’s a great time to stock up on your favorite printing supplies.
Also, don’t overlook color paper — it’s an easy way to save ink while still adding a pop of fun. If you don’t have a color printer, using colored paper can give your black-and-white printables more visual interest (and make them more engaging for kids!).
5. Print a Test Page First
Okay — you’ve adjusted your settings, loaded your paper, and you’re ready to print! But wait…
Before printing a full bundle, always start with a test page. This helps you:
- Check for alignment issues
- Make sure the scale looks right
- Avoid wasting ink or printing the wrong pages
It only takes an extra minute — and it’s especially helpful when you’re printing from a new device, printer, or a printable you’re not familiar with.

Troubleshooting tip:
If your test page has weird lines, blank sections, or streaks, your printer might need maintenance. Run a cleaning cycle or check your printer’s help menu to clean the print heads. Most printers have easy step-by-step instructions built in.
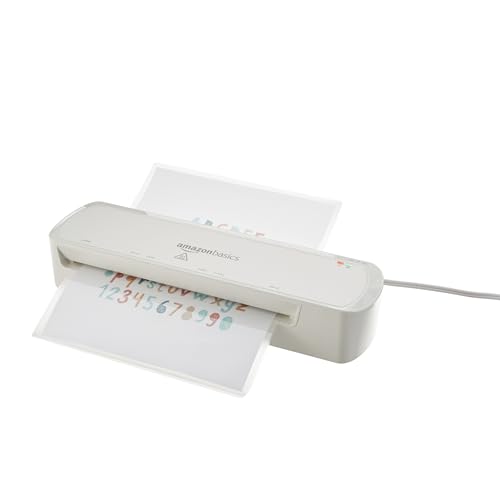
6. Optional: Laminate or Use Dry Erase Sleeves
Want to make your printable last longer? Laminating or using a dry erase sleeve can turn one printed page into a reusable tool.
This works well for:
- Daily checklists
- Weekly routines
- Homeschool planning sheets
- Kids’ chore charts or activity pages
Here’s how you might use this:
- Slip a laminated printable into your command center
- Use a dry erase marker to fill it out each week
- Wipe clean and reuse — no reprinting needed
Mr. Pen- Dry Erase Pocket Sleeves, 10 Shuttle Art Dry Erase Markers, 15 Colors Magnetic Whiteboard Markers, Fine Point, Perfect For Writing on Whiteboards, Dry-Erase Boards,Mirrors for School Office HomeCrayola Take Note Dry Erase Markers (12ct) Whiteboard Markers for Teachers, Low Odor, Chisel Tip, Easter Basket Essentials for Kids, Classroom SuppliesAmazon Basics Thermal Laminator Machine, Laminates Photos Cards Documents, Laminators for Teachers Home Office School, 9 in, WhiteScotch Thermal Laminating Pouches, for Use with Thermal Laminators, 8.9 x 11.4 Inches, Letter Size Sheets, 100 Count


Bonus tip: If your kids enjoy “checking things off,” using dry erase markers makes it feel more interactive.
Want The Checklist?
Remembering how to print printables can be frustrating when you are a working homeschool mom. (Just me?) To make this process easier, I created the Print-Ready Checklist for Working Homeschool Moms.
This one-page printable helps you confidently print any resource by walking you through the key steps covered in this blog post.
It eliminates guesswork, reduces mistakes, and can be printed once and reused (or laminated) to make every print job smoother.
Fill out the form below, and I’ll send it over.

Why Do My Printables Look Different When Printed?
If you’ve ever printed a printable and been surprised that it looked a little different than what you saw on your screen — you’re not alone!
Print color and layout may vary depending on your printer, ink, and paper — and that’s totally normal.
I’ve personally noticed printables can look quite different depending on the device I’m using. The same printable might appear slightly warmer on my laptop, cooler on my phone, and darker on my desktop. Then I print it — and it looks different again.
My husband, who works in a sign shop, says this is completely normal and happens all the time — which is why doing a test print is so important.
Actual print colors may vary due to:
- Monitor or screen brightness
- Printer model and settings
- Paper quality
- Ink saturation levels
Usually you’ll end up with a super cute and functional printable even with these variances!
Tools I Recommend (Optional but Helpful)
If you print frequently, these tools can make life easier:
- A reliable color printer (inkjet or laser)
- High-quality paper (24–32 lb. recommended for clarity)
- Cardstock for reusable or display pages
- Laminator and laminating sheets
- Dry erase sleeves (alternative to laminating)
- Paper trimmer for flashcards or tags
- 3-hole punch and a binder
- A storage bin, folder system, or drawer cart to organize by category or child
- Pens and colored pens for writing and annotating
- Stickers, labels, and dividers to personalize and organize your binders
To make it even easier, I’ve gathered many of my favorite supplies into one place. You can browse them here: My Recommended Printing Supplies List.

These tools can also help kids take ownership of their learning space and make the printables feel “official” and ready to use.
Don’t Have a Printer? Here’s What to Do
No printer? No problem.
If you don’t want to print at home or you’ve got a large bundle to print, here are a few easy options:
- Bring it to a local print shop: Download the file to a USB stick or upload it online to a service like Staples, UPS, or your local office supply store.
- Order online: Use an online printer like VistaPrint or Watson Family Press for higher-volume or color jobs.
- Customize your order: Choose your preferred paper, color vs. black & white, and how many copies you need. Let them know the file is for personal use only.
This is a great option if you’re low on ink, want a more polished finish, or just prefer outsourcing the task altogether.
Printing Printables as a Working Homeschool Mom
Printables are a simple, powerful way to support your homeschool — and when you have the right tools and a smooth system, they become even more useful.
If you’re ready for access to printables that are practical, purposeful, and made just for working homeschool moms — check out The Practical Printables System. You’ll get 30+ categorized resources ready to print!
And of course, sign up for the checklist and print the printables you have!
📌Don’t let this post get lost in the internet abyss – pin it to your Pinterest board now!


Hi, I’m Jen. I help working moms juggle their career and homeschool their kids by providing support, systems and tools. You are warmly invited to Join the Online Community Here!


